Assessing whether a windshield rock chip is too severe to be repaired requires careful observation and consideration. But before you jump to the conclusion of: “time for a windshield replacement…”
Here are 20 Ways to Determine if the Chip is Beyond Repair:
- Size of the Chip: Measure the diameter of the chip using a ruler or measuring tape. Generally, chips larger than a quarter (around 1 inch or 2.5 cm) may be too big for repair. Larger chips are more challenging to fill effectively, and the repaired area may not hold up well against stress and weather conditions.
- Depth of the Chip: Examine the chip closely, looking for signs of how deep it goes into the glass. It may be irreparable if the chip extends through the outer layer of glass into the inner laminate. Chips penetrating through the entire glass pose a risk to the windshield’s structural integrity and may require a full replacement.
- Number of Chips: Check for multiple chips in the windshield. Windshield repair is generally most effective for one or two chips. When there are more than three chips or multiple cracks, repair might not be a viable option. The presence of several chips in close proximity can weaken the windshield significantly.
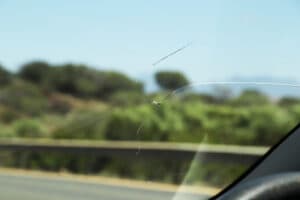
- Crack Length: Measure the length of any cracks emanating from the chip. Repairing cracks that are too long can be challenging and may not yield satisfactory results. Cracks over 12 inches (30 cm) might require a windshield replacement to ensure driver safety.
- Location of the Chip: Consider the chip’s location on the windshield. If it is directly in the driver’s line of sight, repair might not be recommended. Even if the chip is small, any repair attempt can cause slight distortion, potentially obstructing the driver’s view and compromising safety.
- Location of the Crack: Examine the direction and position of cracks extending from the chip. Cracks that reach the edge of the windshield or are close to it are more prone to spreading. If the cracks are too close to the edge, the windshield’s structural integrity may weaken, necessitating a replacement.
- Spiderwebbing: Inspect the chip for signs of extensive spiderwebbing. This indicates that the rock chip damage has spread too far from the initial impact point, making it difficult to achieve a strong and durable repair.
- Contamination: Ensure no dirt, debris, or moisture has entered the chip before considering repair. Foreign particles can interfere with the bonding process during repair and compromise the quality of the fix.
- Previous Repairs: Check if the chip has undergone previous repairs. Multiple repairs can weaken the glass and reduce the chances of a successful repair. In such cases, replacement may be the safer option.
- Age of the Chip: Consider the age of the chip. Older chips have likely been exposed to various weather conditions and stress, increasing the chances of further spreading. If the chip has aged significantly, it may no longer be repairable.
- Temperature Extremes: Evaluate whether extreme temperature changes have affected the chip. Prolonged exposure to extreme heat or cold can cause the chip to expand or contract, worsening the rock chip damage. If the chip has experienced significant temperature fluctuations, repair might not be feasible.
- Cracks Radiating from the Chip: Check for cracks that radiate outward from the center of the chip. These radial cracks indicate that the rock chip damage has extended beyond the initial impact point, making repair more difficult and less effective.
- Bullseye or Star-Shaped Chips: Assess the chip pattern, such as bullseye or star-shaped damage. While some of these patterns can be repairable, it depends on their size and the extent of the damage. Large, complex patterns may not be suitable for repair.
- Structural Damage: Inspect the windshield frame around the chip for signs of severe structural damage. If the chip has caused significant harm to the frame, repair might not be sufficient, and a replacement could be necessary to maintain the windshield’s integrity.
- Flexibility: Gently press the glass around the chip using your finger. If the area feels soft or flexible, it might indicate that the chip has caused substantial internal damage to the windshield layers. In such cases, repair may not be effective.
- Vehicle Safety Standards: Verify if the chip’s location and extent meet the safety standards for windshield repair set by your region’s transportation authorities. Different places may have specific regulations regarding the allowable size and location of repaired chips.
- DIY Attempts: Check for any signs of previous DIY repair attempts. If someone has already tried to fix the chip using off-the-shelf repair kits and the results were unsatisfactory, that could complicate professional repair efforts.
- Moisture in Layers: Examine the chip for any trapped moisture between the layers of glass. Moisture can interfere with the repair process and weaken the bond between the layers, making repair impractical.
- Size of the Damage Zone: Assess the overall area affected by the chip and any accompanying cracks. Repair might not be the most effective solution if the damaged zone is extensive. In such cases, replacing the windshield may be the safer option.
- Professional Opinion: When in doubt about the severity of the chip, it is essential to consult a professional windshield repair technician. An expert can thoroughly assess and recommend the most appropriate course of action. They have the expertise to determine whether repair is possible or if replacement is necessary to ensure the windshield’s safety and longevity.
If you have gone through all of these reasons and it looks like a windshield repair is not an option, you are most likely looking at replacing it.
Not to Worry, That is Easy-peasy. Here are the Steps to Get You Started:
- Contact Auto Glass Shops: Begin by searching for reputable auto glass shops in your area. Look for businesses with good customer reviews and a track record of providing quality windshield replacement services.
- Get Quotes: Reach out to multiple auto glass shops and request quotes for windshield replacement. Provide them with your vehicle’s make, model, and year to ensure accurate pricing.
- Check Insurance Coverage: If your auto insurance policy covers windshield replacement, contact your insurance provider to understand the terms and conditions of the coverage. This information will help you determine your out-of-pocket expenses.
- Choose OEM or OEE Windshield: Decide whether you want an Original Equipment Manufacturer (OEM) windshield or an Original Equipment Equivalent (OEE) windshield. OEM windshields are made by the same manufacturer as your vehicle, while OEE windshields are made by reputable third-party manufacturers to the same specifications as the original.
- Schedule an Appointment: Once you’ve selected a reputable auto glass shop and decided on the type of windshield you want, schedule an appointment for the replacement. Many shops offer mobile services so that they can come to your location for added convenience.
- Prepare Your Vehicle: Remove personal belongings from your car’s interior and clean the windshield area to ensure a smooth replacement process.
- Ask About Safe Drive-Away Time: After the replacement, inquire about the safe drive-away time. Adhesives used for windshield replacement require a specific curing period before the vehicle can be driven safely.
- Check Warranty: Ensure that the auto glass shop offers a warranty on their windshield replacement service. Warranties can vary, so be clear about what is covered and for how long.
- Verify Certification: Confirm that the auto glass technicians performing the replacement are certified and experienced in windshield replacement procedures. Certified technicians are more likely to ensure a proper installation.
- Arrive on Time: Show up for your appointment on the scheduled date and time. This allows the auto glass technicians to begin work promptly.
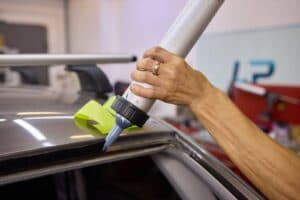
- Removal of the Old Windshield: The technicians will remove the damaged windshield carefully, ensuring that all the old adhesive is removed.
- Proper Installation: The new windshield will be installed using high-quality adhesive and aligned correctly to ensure a proper fit.
- Cure Time: The adhesive used for the replacement needs time to cure. The technicians will inform you of the safe drive-away time; following their recommendations is crucial.
- Inspection: After the windshield replacement, inspect the new windshield for any defects or imperfections. A reputable auto glass shop will address any issues promptly.
- Payment: Make the payment as agreed upon with the auto glass shop. If you use insurance coverage, the shop will work directly with your insurance provider for payment processing.
- Receipt and Documentation: Obtain a receipt for the windshield replacement service and any warranty documentation provided by the auto glass shop.
- Care Instructions: Follow any care instructions the technicians give to ensure the longevity of your new windshield.
- Clean Up: Ensure the auto glass technicians clean up any debris or materials used during the replacement process.
Select a reputable auto glass shop with experienced technicians to ensure a proper windshield replacement. A correctly installed windshield is vital for your safety and the structural integrity of your vehicle.
Utah Mobile Auto Glass
Whatever windshield issue you face, the best thing to do is leave windshield replacement or repairs to a professional, which is where Utah Mobile Auto Glass comes in.
We have trained technicians ready and willing to share their knowledge and expertise with you about alleviating your windshield woes. Contact Utah Mobile Auto Glass online or at 801-997-9161, and let’s repair or replace your windshield today!